


如何安装固定式龙门起重机?
2023 年 6 月 19 日
如果您从事制造或建筑行业,则可能需要固定龙门起重机来吊起和移动重物。安装固定龙门起重机似乎是一项艰巨的任务,但只要有合适的工具和准备,就可以快速高效地完成。在本文中,我们将指导您完成安装固定龙门起重机的步骤。
固定龙门起重机安装前的准备工作
选择正确的位置
安装固定龙门起重机的第一步是选择正确的位置。位置应平坦且水平,有足够的空间让起重机安全运行。您还需要确保没有高架障碍物,例如电线或树枝。此外,您还需要考虑安装起重机的地面的承重能力。
准备所需的各种工具
- 扭矩扳手:此工具可确保螺栓按照正确的规格拧紧,并防止过度拧紧而损坏起重机组件。
- 卷尺:可以进行精确测量,并有助于确保起重机安装在正确的位置。
- 焊机:用于将金属部件连接成单一结构。
- 移动式起重机:用于在安装过程中提升重型部件并将其移动到位。
固定龙门起重机安装步骤
步骤 1:构建基础
选择正确的位置后,下一步就是建造地基。地基应由混凝土制成,深度应足以支撑起重机的重量及其承载的负载。地基的深度取决于起重机的承重能力。

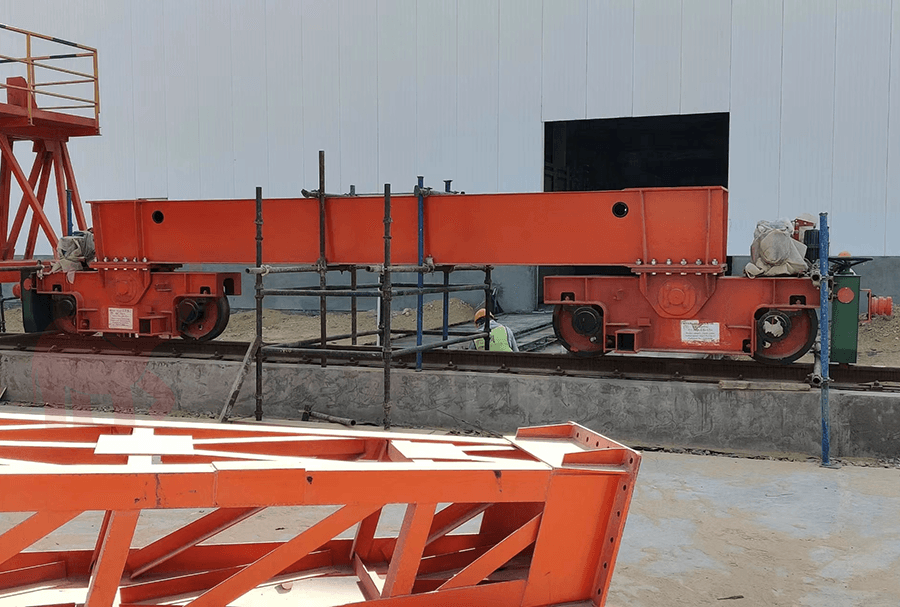
步骤2:行走机构及下横梁安装
行走机构负责使起重机沿轨道长度移动,而下梁则作为起重机提升机和小车系统的基础。
铺设轨道后,即可将行走机构安装到轨道上。这包括将小车轮安装到行走机构上,并用螺栓将其固定在轨道上。然后可以将下梁安装到行走机构上,这通常包括将梁安装到小车上,并用螺栓将其固定到位。
步骤 3:安装支撑腿
地梁安装到位后,即可安装支撑腿。支撑腿应位于地梁的两端,并应牢固地用螺栓固定在地基上。支撑腿应垂直和水平放置,使其与地梁垂直。

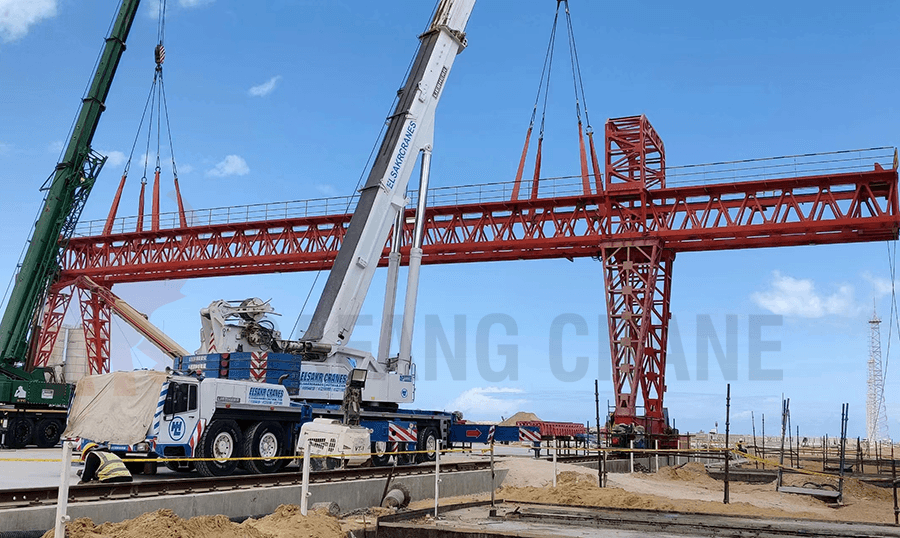
步骤 4:安装主梁
要安装主梁,您需要使用起重机或其他起重设备将其吊起到位。然后您需要将其放置在支撑腿顶部,并使用螺栓或其他紧固件将其固定到位。
检查支撑腿和主梁是否水平,必要时进行调整。
使用螺栓紧固支腿与主梁之间的连接。确保螺栓紧固到位,以防止起重机移动或晃动。
步骤 5:安装电气设备
安装固定龙门起重机的最后一步是安装电气设备。这涉及将起重机的各种电气部件(例如电机和控制器)连接到电源,并确保它们全部正常运行。以下是安装电气设备的方法:
- 连接线路:第一步是连接起重机电气元件的线路。这通常涉及将电线从各个元件连接到控制面板或其他中央位置。
- 测试系统:接线完成后,您需要测试系统以确保所有组件正常运行。这可能涉及执行一系列测试或检查以验证起重机是否正常运行。
- 最后的调整:最后,一旦电气设备安装并测试完毕,您可能需要对起重机进行最后的调整,以确保其以最佳性能运行。
固定龙门起重机安装后测试
- 进行目视检查:在开始任何测试程序之前,对整个起重机系统进行目视检查非常重要。这包括检查所有移动部件、电线、电缆、起重机和吊车,以确保它们位置正确且固定牢固。
- 负载测试:下一步是进行负载测试,以评估起重机的起重能力。首先将测试重物(通常是装满水的容器)连接到吊钩上,然后慢慢将其从地面提起,直到达到龙门起重机的最大高度。将负载固定几分钟,以确保一切稳定且牢固。
- 测试紧急停止功能:在紧急情况下,起重机操作员应能够使用紧急停止按钮立即停止所有起重机移动。按下紧急停止按钮并确保所有起重机移动完全停止,以测试此功能。
- 进行空载测试:进行空载测试对于检查起重机在未附加任何负载的情况下的运动和速度至关重要。将起重机吊钩提升到最大高度,然后操纵起重机的滑车在龙门轨道上来回移动。这可以检查起重机运动的精确度,并确保没有急促或不均匀的运动。
- 检查过载保护系统:过载保护系统是一项重要的安全功能,可防止起重机提升超过其额定容量的负载。要测试此系统,请将超过起重机额定容量的负载连接到吊钩上。过载保护系统应自动触发并防止起重机提升负载。
- 测试限位开关:限位开关是防止起重机在任何方向上超程的重要安全功能。通过将起重机吊钩缓慢移向其允许行程范围的每一端来测试限位开关。当起重机到达其范围的末端时,其运动应自动停止。
- 检查电气系统:最后,检查电气系统以确保所有连接牢固,起重机的控制面板正常运行。测试吊坠控制器以确保所有动作平稳且反应灵敏。
常见问题
- 固定龙门起重机安装需要多长时间?
安装时间取决于起重机的大小和安装现场的复杂程度。平均而言,安装可能需要一天到几周的时间。 - 我可以自己安装固定龙门起重机吗?
虽然您可以自己安装固定龙门起重机,但为了安全和效率起见,建议您聘请专业的安装团队。 - 选择龙门起重机的位置应考虑哪些因素?
应根据负载要求、可达性、安全考虑和环境法规来选择龙门起重机的位置。 - 龙门起重机使用的电气控制装置有哪些?
龙门起重机的电气控制包括限位开关、过载保护、变频驱动器和电动机起动器。 - 龙门起重机多久检查一次?
应根据制造商的指南和适用的安全法规定期检查龙门起重机。检查频率可能因使用情况和环境条件而异。
发送您的询问
- 邮箱: sales@hndfcrane.com
- 微信: +86-191 3738 6654
- 电话:+86-373-581 8299
- 传真:+86-373-215 7000
- 地址:中国河南省新乡市长脑工业区